
If you are looking to grow healthy and luscious relaxed hair, you’ve come to the right place. In this guide, we’ll walk through the steps to properly relax your hair at home, so you can achieve salon-like results. Get ready to unlock the secrets to gorgeous, healthy, relaxed hair!
Table of Contents
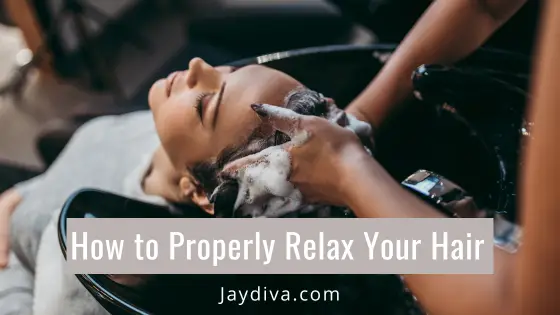
How to Relax Your Hair at Home
At the beginning of my relaxed hair journey, one thing I found very daunting to do was to relax my hair. I did not like the idea of going to the hairdressers because, to be honest, back in the day, the hairdressers didn’t know much. They were very rough and always over-processed my hair.
I quickly realized that the best thing for my hair was to learn to properly relax my hair at home
Preparing for the Relaxing Process
Before we begin the relaxing process, it’s essential to gather the necessary tools and products. You’ll need a relaxer kit suitable for your hair type, a mixing bowl and brush, petroleum jelly or a protective base for your scalp, and a protein-based conditioner. These items are essential for achieving optimal results.
Oh, and don’t forget the strand test! It’s a crucial step in determining the ideal strength of relaxer for your hair. Take a small section of hair, apply the relaxer, and observe the results to avoid using a relaxer that’s too strong or too weak for your hair.
Additionally, ensure your hair and scalp are in good condition before relaxing. Trim your hair to eliminate split ends and remove any product buildup. Moisturize and deep condition your hair in the days leading up to the process to keep it nourished and strong.
Here is a list of my favorite relaxers for all hair types as well as a list of relaxer day essentials here to make the process a breeze
Pre-Relaxer Routine
To protect sensitive areas like the hairline and ears, apply petroleum jelly or a protective base. This step is crucial to prevent unintended relaxer burns.
Next, divide your hair into manageable sections to ensure even application. Apply a protein-based conditioner to previously relaxed hair, creating a shield against the relaxer run-off and protecting it during the process.
Follow the manufacturer’s instructions to mix the relaxer correctly, ensuring the desired consistency and effectiveness
Applying the Relaxer
Now, let’s move on to applying the relaxer!
Start by applying the relaxer to the new growth, section by section. Use the back of a comb or an applicator brush for even distribution. Remember to concentrate the relaxer only on the new growth, avoiding contact with previously relaxed hair to avoid over-processing.
Remember, each hair texture and strength is unique, so adhere to the recommended processing time specified on the relaxer kit. Patience is key to achieving fabulous, healthy hair!
Rinsing and Neutralizing
After the processing time is up, rinse out the relaxer thoroughly with warm water. Ensure no traces of the relaxer are left behind. Thorough rinsing is crucial to prevent any potential damage.
Next, apply a neutralizing shampoo to halt the relaxing process. Massage your scalp and hair gently for complete neutralization. Rinse with cool water to close the hair cuticles and seal in the goodness.
Post -Relaxer Care
Give your hair some tender love and care after the relaxing process. Apply a deep conditioning treatment to restore moisture and strength. This rejuvenating treatment is essential for hair recovery. Use a wide-toothed comb to detangle your hair gently, starting from the ends and working your way up. This step prevents breakage and maintains a smooth and sleek appearance.
For the next week, avoid heat-styling tools and excessive manipulation. Allow your hair time to adjust and recover from the relaxing process. Instead, moisturize regularly and seal in the moisture with natural oils or leave-in conditioners.
Additional Tips for Healthy Relaxed Hair Growth
Let’s explore some additional tips to support your journey toward growing healthy and gorgeous relaxed hair:
- Minimize the use of heat styling tools: Excessive heat can lead to dryness and breakage. Embrace air-drying whenever possible and experiment with heat-free styling options like braids, twists, and buns. If you use heat occasionally, apply a heat protectant spray beforehand to minimize damage.
- Protect your hair at night: Invest in a satin or silk bonnet or pillowcase to protect your hair while you sleep. These materials create less friction, helping maintain moisture and reduce frizz.
- Incorporate protein treatments: Replenish lost protein, repair damage, and increase the overall strength of your strands with protein treatments. Look for protein-based conditioners or treatments specifically formulated for relaxed hair. Incorporate them into your routine every few weeks to keep your hair strong and resilient.
- Stay hydrated and maintain a balanced diet: Drink plenty of water throughout the day to keep your body and hair hydrated. A balanced diet rich in vitamins, minerals, and proteins is essential for promoting healthy hair growth. Include foods like leafy greens, fruits, lean meats, nuts, and seeds in your diet to provide your hair with the necessary nutrients.
- When in doubt, consult with a professional stylist: If you’re unsure about a particular hair care practice or experiencing challenges with your relaxed hair, schedule a consultation with a professional stylist specializing in relaxed hair. They can assess your hair’s specific needs, provide personalized advice, and recommend suitable products or treatments.
In Conclusion
Remember, healthy relaxed hair requires consistent care and attention. Be patient with your hair growth journey, embrace the uniqueness of your hair, and celebrate the progress you make along the way. By following these steps in relaxing your hair, as well as the additional tips for maintaining a holistic approach to hair care, you’ll be well on your way to achieving vibrant, healthy, and beautifully relaxed hair.
I hope you found this post helpful…I will see you at the next one XoXo


 I’m Dr Janet, a medical doctor, blogger, Youtuber and a mother to two awesome kids. I help women achieve their natural hair, skincare and health goals.
Glad to have you here
xoxo
I’m Dr Janet, a medical doctor, blogger, Youtuber and a mother to two awesome kids. I help women achieve their natural hair, skincare and health goals.
Glad to have you here
xoxo